I didn't know anything about gardening. I didn't know anything about hardware. I guess that's the reason why I decided to work on a new hobby project where I had to learn about both. I started to grow a blueberry plant, 100% automated using a Raspberry Pi.
Next to my main gig, data scientist, I always work on some hobby projects. These don't make a lot of money (or sense), but they are fun, and I use them to expand my knowledge into areas that I don't know much about. I could go on and on about why working on side projects is great.
But given all my experience with side projects, I gotta say I may have been a bit too ambitious when I thought that I'd build a hardware project easily. As it turned out, in many aspects, it's very different from software. I learned that the hard way.
Here’s my most important takeaways!
The beauty of a hardware project: You can touch the product!
I’d previously worked on plenty of software hobby projects. But for me, a hardware project was exciting for two reasons:
First, I recently became interested in growing my own food. Knowing that I can produce at least a small part of what I'll eat is really satisfying. However, I'm really bad with repetitive things and I always tend to forget watering my plants. So I had two choices: setting up tons of calendar reminders or acting like an engineer and automating the whole process. Obviously, I went with this latter one.
Secondly, I'm a data scientist. I write code, I create models, I run scripts, but all these exist in my computer only. Sometimes they only exist in the cloud, which is another layer removed from me. I wanted to create something that I could touch!
So a hardware project seemed reasonable.
The plan (it was supposed to be easy…)
In my head, the plan was simple:
- Take a tiny computer (e.g. a Raspberry PI).
- Take a soil moisture sensor and a light sensor that connect to this computer via wifi and send data points continuously about my plant.
- Take a water pump and a grow lamp that get activated via wifi when data indicates the plant needs something.
I imagine everyone who starts a project like this one would come up with a similarly simple plan. As a software person, I've already seen the dataflow, the simple `if` statements, the automations in crontab. In my head, the whole project was done in a week.
I was so naive—and so wrong…
Getting started: Hardware is slow!
There is a good chance that, like me, you've written code but have never ever worked with actual hardware.
Whenever I want to start a new software side project, I can get started quickly:
- I choose a framework, environment, solution, etc…
- I deploy the server (download and install the OS and other applications, etc.)
- I wait until installation is complete. (~10-30 minutes)
- I start to build the project.
It's a bit oversimplified, but you get the point. One can move on from the idea phase to the execution phase in ~10 minutes (or less).
The first thing I had to learn is that this is not the case for a hardware project. More like:
- You choose your framework, environment, preferred hardware, etc…
- You order the hardware.
- You wait for your delivery. (~1 week)
- You install everything. (~10-30 minutes)
- You start to build the project.
That additional one step (wait for delivery) may not seem like a big deal. It is. Especially when you realize that you forgot to order something. Or one piece of hardware is not compatible with another one. Or that the replacement is not available in your country.
That one week could easily grow into a month or more. And waiting can kill hobby projects.
But breaking down the tasks helps here, as well.
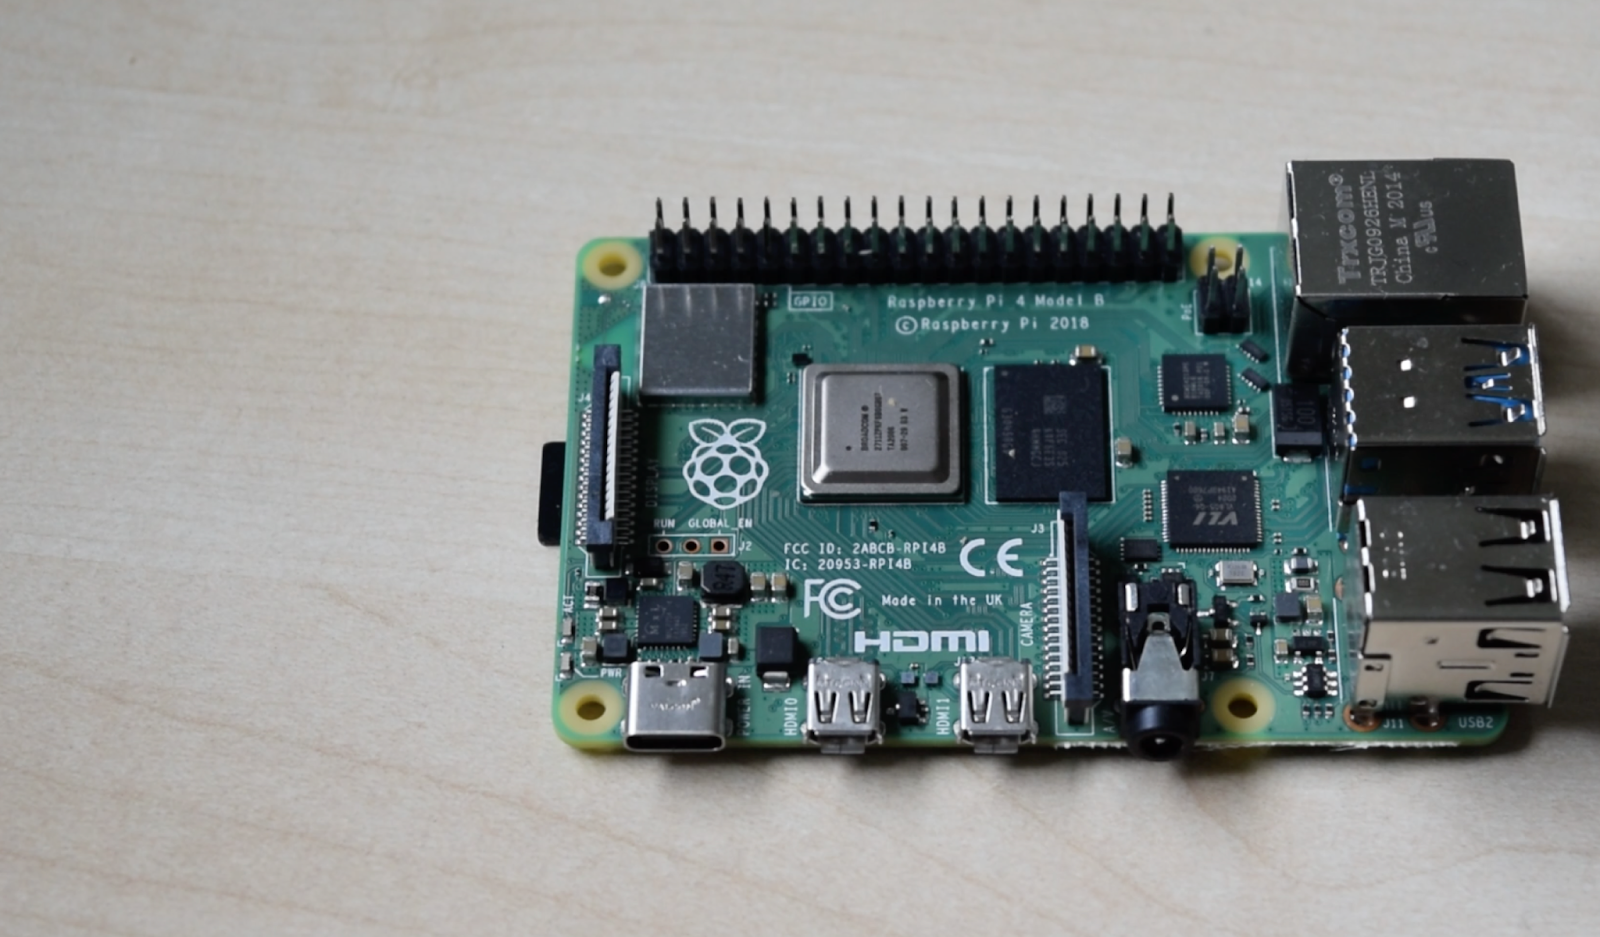
For my automated gardener, I started small—instead of ordering everything I needed, I focused on building only a small part of the project first: the soil moisture sensor. I got my first test-stack (a Raspberry Pi 4, an SD card, an Adafruit STEMMA moisture sensor and a few jumper cables) in a few days. (Actually, I ordered the wrong kind of jumper cables. That added a few days. In about a week, I finally got started.)
Once the moisture sensor worked, I started to add all the other parts. I continuously ordered the new hardware that I needed—or the replacements when it turned out that I ordered the wrong parts. Sometimes, I ordered the right parts but I made a conceptual mistake. (e.g. I tried to build a mechanical tap instead of using a simple water pump. God knows why.) That's more ordering—and more waiting.
Long story short: after all the testing and building, it took no less than three months to reach my final stack of the full autogardener. Again: building hardware is slow.
Debugging hardware is also hard
It's not just that building hardware is slower than building software. It's also significantly more difficult to debug it!
As I mentioned, my first step was to build the moisture sensor part. Once I got it to work and got my first moisture data on my screen, I got very excited.
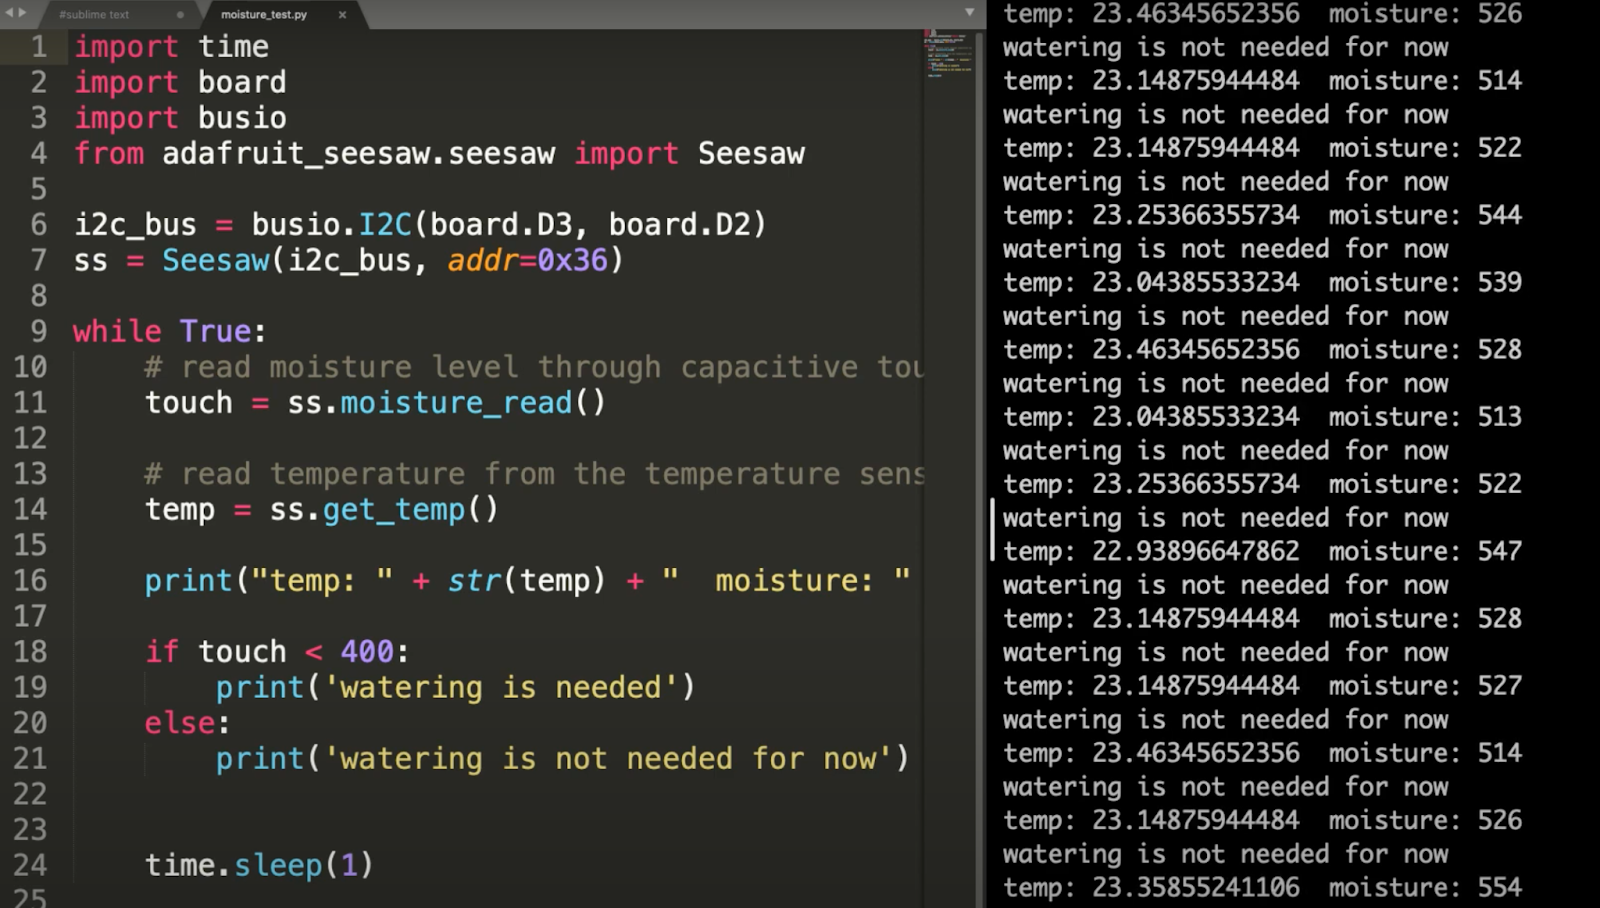
But the day after, it just stopped working.
It took me three hours(!) to figure out the problem. I investigated on a software level. Nothing. I rebooted the Raspberry Pi multiple times. Nothing. I cleaned the moisture sensor. Then I disconnected it from the board then connected it again. Nothing.
I was stuck. The main problem was that my debugging process—which I learned for coding—didn't help me, either. When I write code, I just run debug mode, look at the error messages. When these don't help, I re-run my code line by line. Sooner or later, I find the issue.
But this time I got a very generic error message, I didn't really find the error in the code and I had no idea how to debug hardware. Eventually, it turned out that the issue was with a slightly damaged jumper cable. Which sounds obvious now, but when you are an absolute beginner with hardware, you don't think that jumper cables can be damaged. For me, it sounded like the `print()` function gots damaged in Python. That can't happen. Of course, I was wrong.
But at least this was a problem that I eventually managed to fix for myself.
There was another problem I couldn't fix:
At one point, I had to replant the blueberry plant. Right after that, the moisture sensor started malfunctioning: it returned the maximum moisture level all the time. Even when my soil was dry like a desert, it showed that my blueberry didn't need watering. My plant wasn't really happy.
When I realized the problem, I started investigating again. It took hours again—but this time without any success. As my last resort, I went to some online forums. Luckily, a few people had the same issue as myself.
It turned out that my specific type of moisture sensor and my specific type of soil don't work well together. Huh!? Better yet, there is a work around: wrapping the moisture sensor with three layers of duct tape. I mean who would think about that!?
In software, you debug by finding flaws in the logic: a malformed `for` loop, bad syntax, mishandled data. But debugging hardware means dealing with real objects that can break, disconnect, or react physically with other substances. That takes experience—and a good understanding of physics. Which leads us to the next point.
For software you have to be good with logic. For hardware you need physics, too.
My greatest realization was that working with hardware needs a great understanding of physics.
Remember how everyone told us that we won't use anything that we learned in high school physics classes about:
- electricity (eg. Ohm's law)
- capacity
- hydrostatic pressure
- how to measure light levels
- radio signals
To make this auto gardener work, I had to understand all these. Luckily, I did well in physics in high school. But in the last ten years, I focused on coding and data science. Those fields are closer to mathematics and logic, while physics is as messy as the real world.
When you run the same code twice, you generally get the same result. However, when you run your water pump for ten seconds multiple times, you almost never get the exact same amount of water to your plant—not to mention the moisture level that you measure after that. That's because of natural variance and the random effect of real things.
But again: that's the beauty of a hardware project! It makes you understand that the world is not a controlled laboratory even when talking about an indoor auto-gardener.
You can't control hardware to the same level as you do with software. Regardless, you have to be cautious because...
Hardware can be dangerous
As I said, starting this project, I was excited. But I was also somewhat worried.
When I make a mistake in a machine learning algorithm, a few bad things can happen, like it won't return the expected output. If I mess up something really badly, I might overload the server, so other scripts stop, too. Absolute worst case scenario, we might experience data loss.
Hardware is different. Here you can cause serious real damage if you are not careful. For instance, if I do the wiring wrong, I can fry my Raspberry Pi. Worst case scenario is that something catches on fire (electricity and water together can cause a lot of unpleasant surprises). My biggest worry was that I'll burn down the whole office. Okay, I might have been paranoid thinking that.
Still, with hardware you have to be extremely careful!
Luckily, coding experience can help, as you can apply similar approaches to reduce risk:
- Like unit testing or running in a test environment, you can create a physically separated environment (eg. surrounding the auto-gardener with non-flammable materials).
- You can set up monitoring and alerting systems (eg. adding a smoke detector that sends a push notification to your phone when there's an emergency situation).
- You can create backup systems (eg. I have a second Raspberry Pi on a separate network that can shutdown my main Raspberry Pi).
Either way, working with hardware means higher risk, so be more careful than working with software. Again, you’re dealing with physics, not math, and physics can hurt.
My automated gardener
At this point, I guess, you may be interested in what that final auto-gardener stack looks like:
- Raspberry Pi 4 (Model B)
- Capacitive moisture sensor (Adafruit STEMMA)
- 5V mini water pump (horizontal)
- light sensor (Adafruit Lux Sensor)
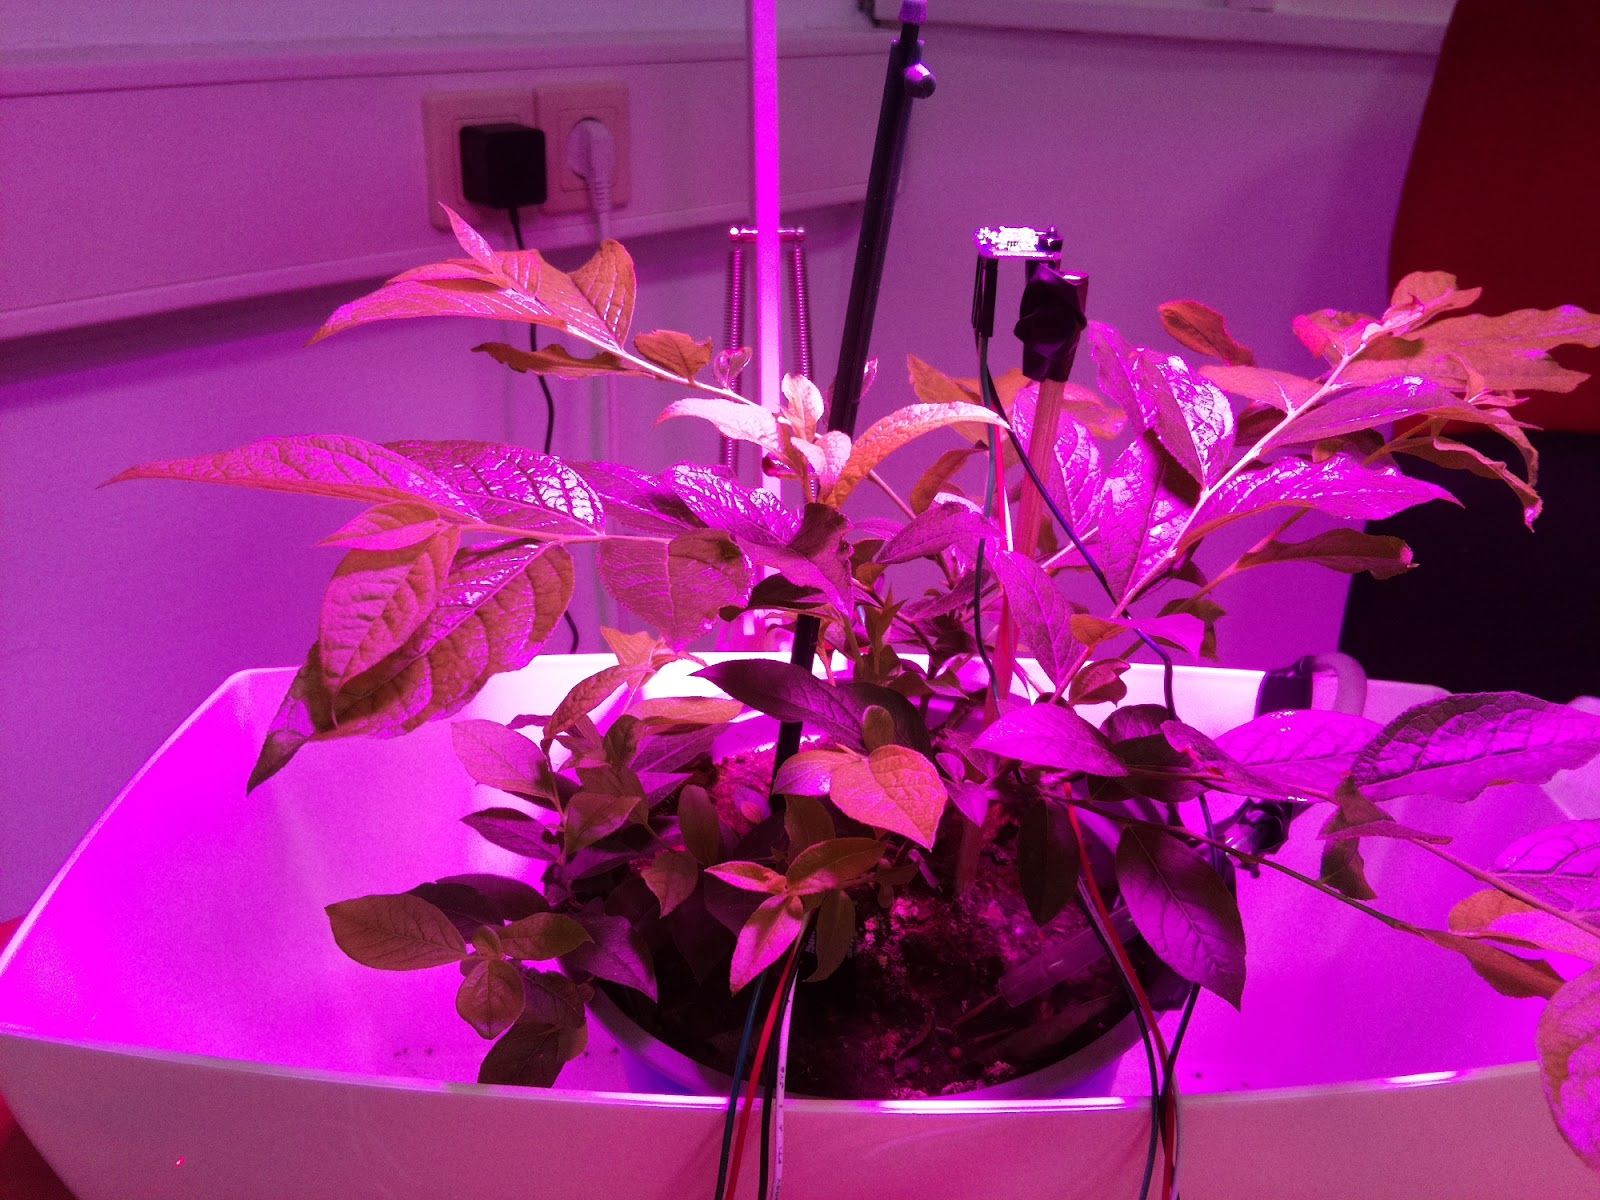
- Growing lamp (25 umol/s—note I might need more than this)
- 433 Mhz plug + remote
- 433MHz RF transmitter
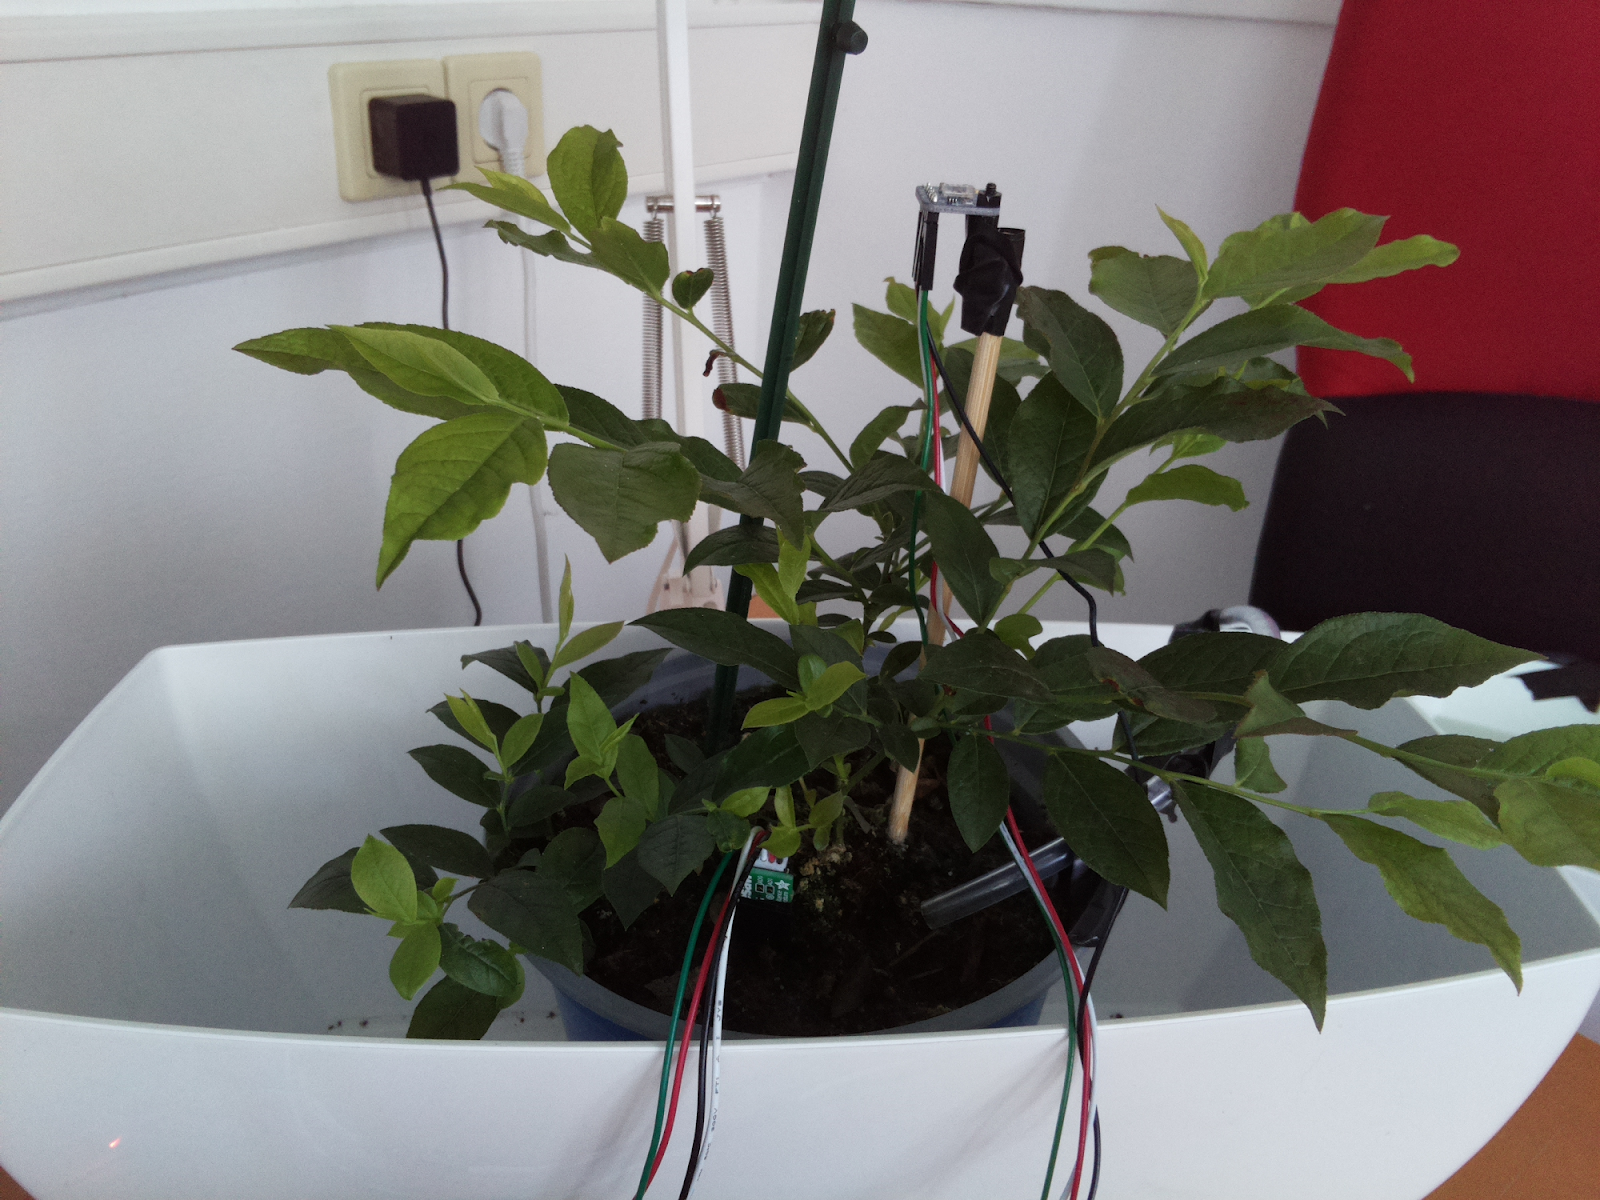
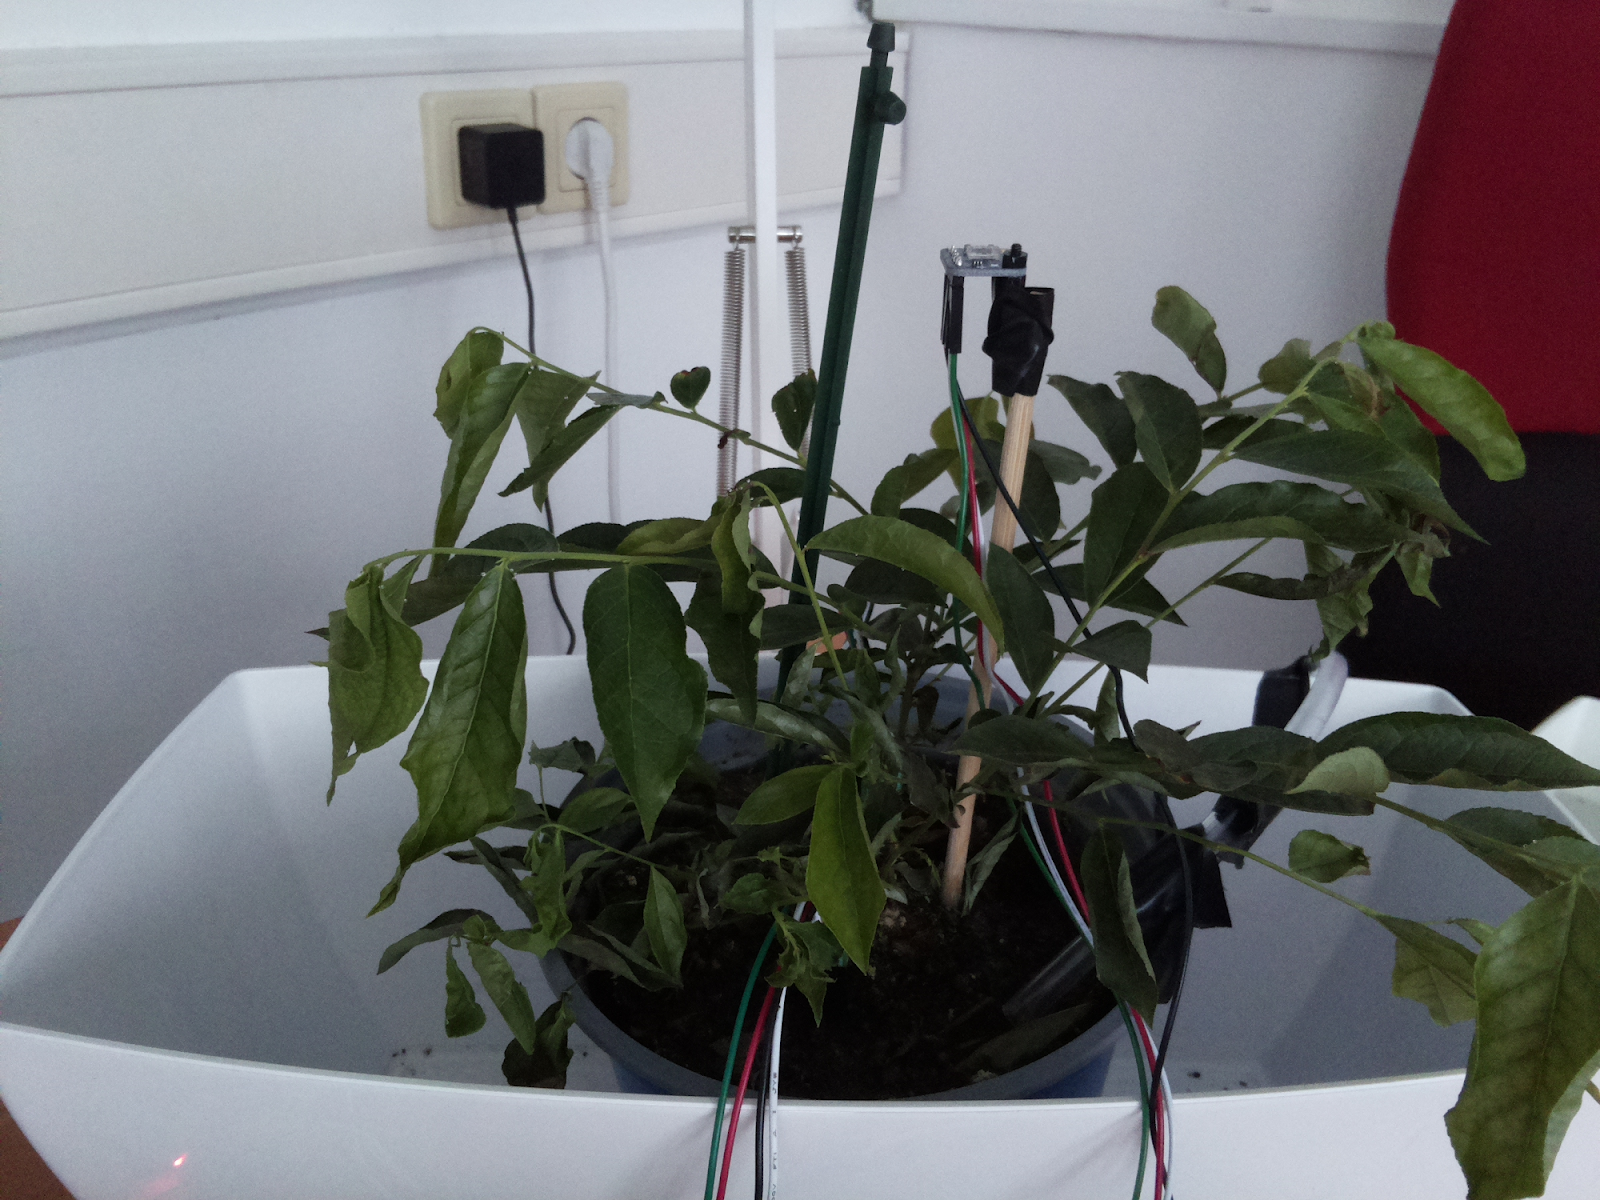
- And a blueberry plant (Before you ask: I know this is a strawberry plant in the picture. That was my first try. But it died. See, when working with hardware, a minor logical error in your script can be lethal.)
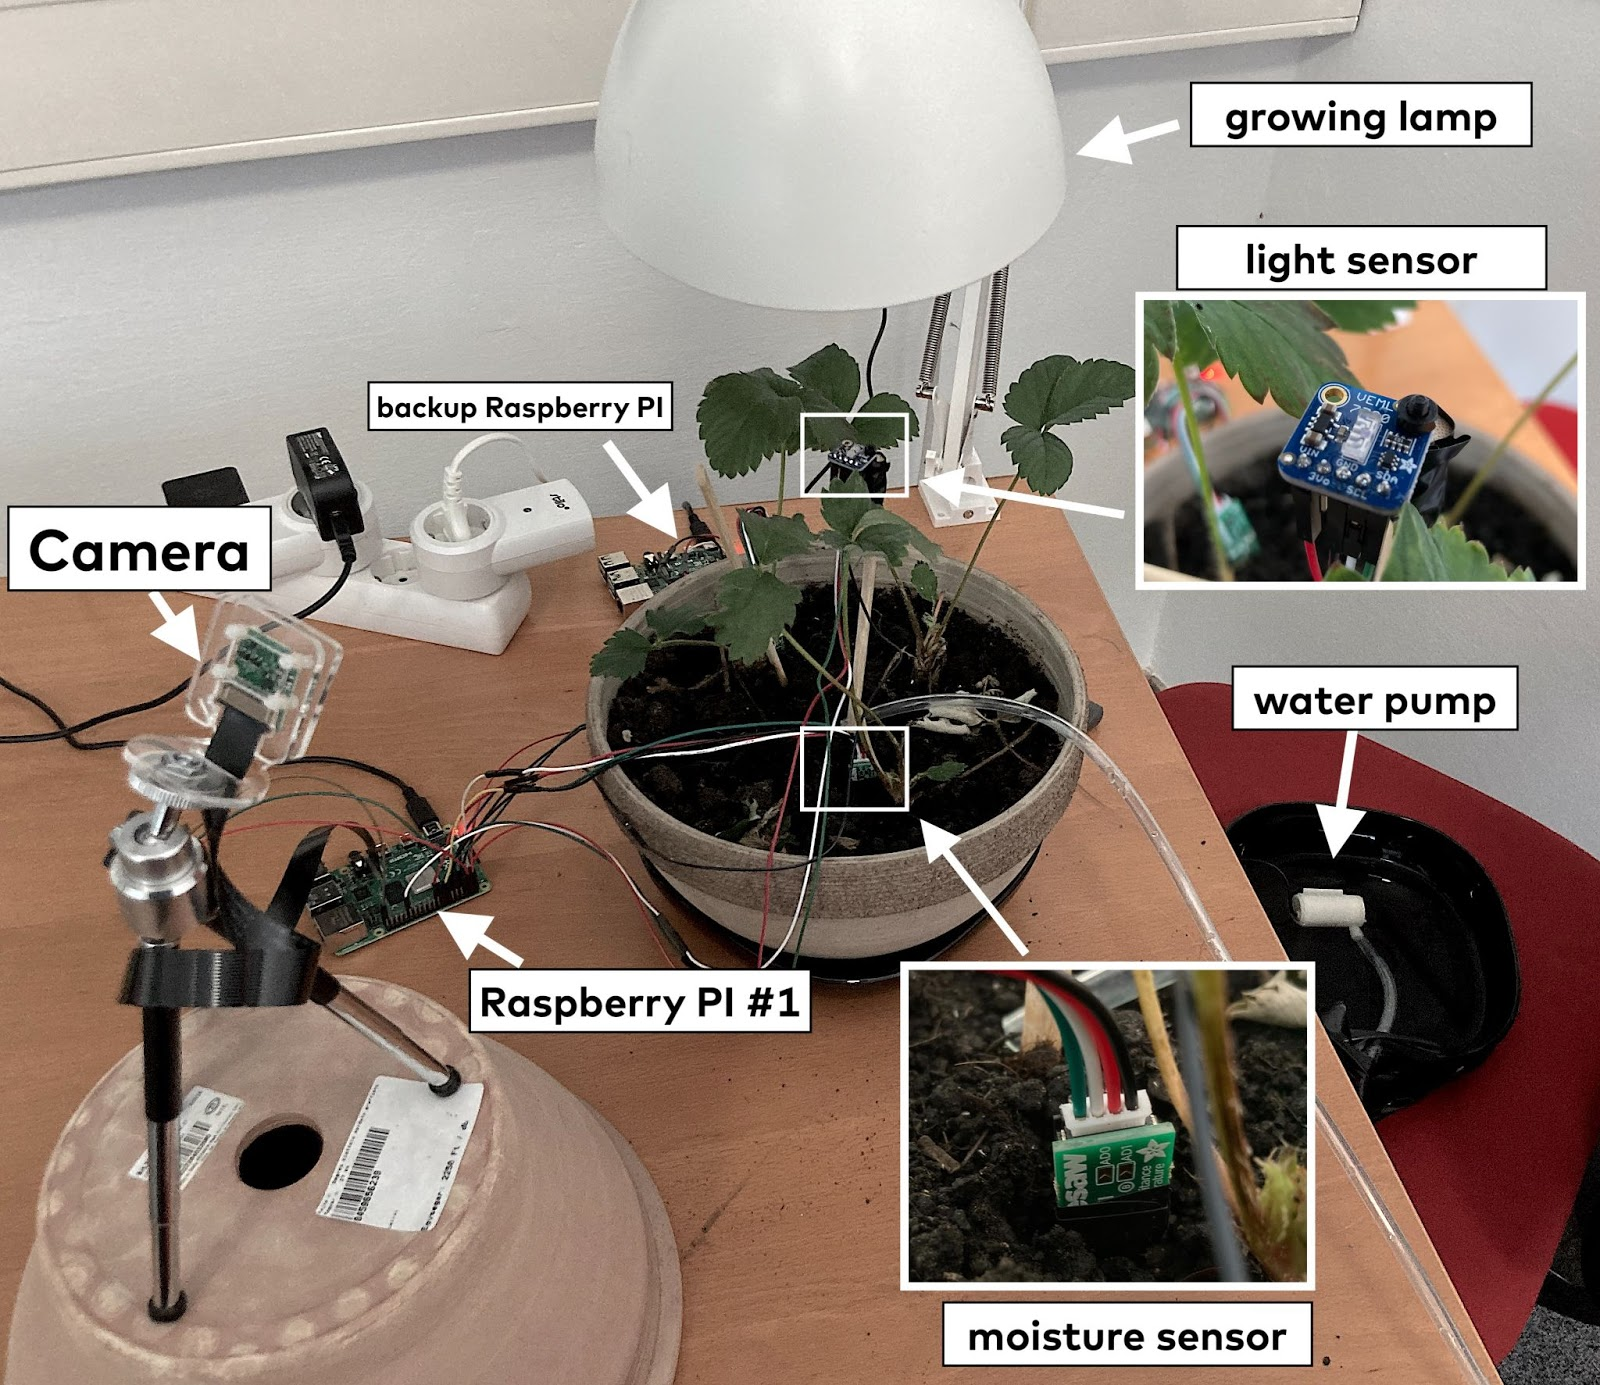
The design is this:
- When the moisture sensor signals low moisture level, the radio transmitter turns on the plug and the water pump adds the appropriate amount of water.
- The light sensor measures the light level and it turns the growing lamp on or off.
- The camera takes photos of the plant so I can do deep learning based image processing and optimization create cool timelapse videos.
(Note that I'm still at the learning phase, so I might replace some parts of this set. Your recommendations are welcome in the comment section!)
I tried to document the whole building process, so if you want to learn more about the details and see the coding part as well, check out my video series on Youtube.
The complexity of a hardware project is a whole new level
This is only a slice of this project, albeit the one that represents the hard part. It might feel like a hardware project is a hassle. And it is. Its complexity is a whole new level (for someone coming from the software world, at least). But that's why it was so satisfying for me.
I got to learn so many new things:
- How does a Raspberry Pi (and all its accessories) work?
- What do plants need to grow and why?
- How can you communicate with a physical object by writing code?
But the most fulfilling part is definitely the blueberry—I see it and touch it—and it grows automatically. Can't wait for the first harvest!